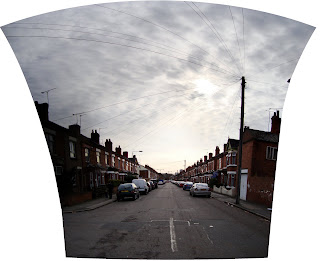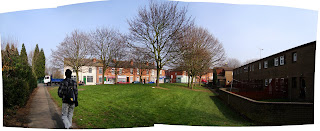

I finally learn't how to create breath taking panoramas. It is strange that I am including this in Weirdness but the thing is, it is!
The way the above panoramas are created is absolutely weird; specially considering the fact that I spent 0p on softwares! :D
Okay; So here is a step by step guide to creating a Panorama in Ubuntu 8.04. Sorry guys; if you are not a penguin, don't read ahead! :P
The "penguins"; Just read ahead! ;)
First; We need to download and install "autopanog".
This software is needed in order to automatically detect 'common' points which are referred to, herewith, as 'Control Points'. It's a great little gadget with some MASSIVE wizard work behind it, with an implementation of something called the "sift" algorithm. That's basically not what I can explain.. lol
So, open terminal and type in
sudo apt-get install autopano-sift
Done ? Great!
Now download and install Hugin.
This is basically a software responsible for "Hugging" all your images into a ONE BIG one! :D.
You can find that easily through the "Add/Remove" panel.
Done ? Brilliant!
Now- Get your Camera, put the batteries in and then read what is written ahead.
Ahead:-
If you have a "Grid" feature on your camera; Now is the time to use it. Enable that.
I am going to demonstrate a quick walk through of How to take photos so that you can create a panorama. (well basically you can find a way better tutorial off Google and I know you will, so I won't be meticulous about anything lol)
Okay; So.. I turn ON my camera, Turn ON my GRID feature and take a SNAP! - Simple. Then; Keep the camera at the same height, zoom, exposure and focus settings and turn it by so much a degree, so that you are overlapping about 30 to 40 percent of the previous image. Simple ? ;)
With the Grid; You can easily, precisely and quickly do an overlap but with the Grid off.. you should be careful although it is NOT mandatory to be precise and/or accurate in your overlapping or imaging. Once you use the software package and once you get an idea of how and what the software is doing; You'll understand what I mean by THAT. :)
So ? Have you taken some overlapping pictures as yet or not ? oh darn it! - Do I have to tell you EVERYTHING ? :P
Done ? Good job!
Now; Import these pictures into your computer. Open terminal and direct it to the directory where these images are and then command it
autopanog
This would initiate a GUI of autopanog. Click on the "Load Images" button and load all the overlapping images you wish to create the panorama of. Then hit "COMPUTE".
Please note that autopanog creates some temporary files in your folder where you had your images and please also note that you MUST have the images in the same folder from where you run autopanog because "Hugin" needs the source files to create the final panorama and it expects them to be in the same place as the temporary files it will use to compute and stitch everything together.
After autopanog computes your images; You can now close the small autopanog's status window.
Run Hugin.
Now; In Hugin click on Open and locate to the directory where you had your images and the temps created by autopanog. There you will find a file named; "output.pto". Just select that and open.
Now; Hugin will ask you about the Horizontal Field of View of your lens. For a compact camera, it is generally around 50degrees. That's what I use.. and I get good results. :) - If you know the exact value of your camera, go ahead. :)
After inserting that.. just click "align" from the main Hugin window and then "Create Panorama" and then hopefully; vola!

-----
The most weird thing in this is the availability of such great software suites under the GNU/GPL license.
If you really can get your way around them; they are simply THE most powerfull applications you might ever come across! Take GIMP for example; it's a nifty little tool compared to a Memory hogging Photoshop suite! OR take Blender for instance; it's a 9MB worth of 3D Modelling program! :|


